
How to Remove Pilling From Clothes
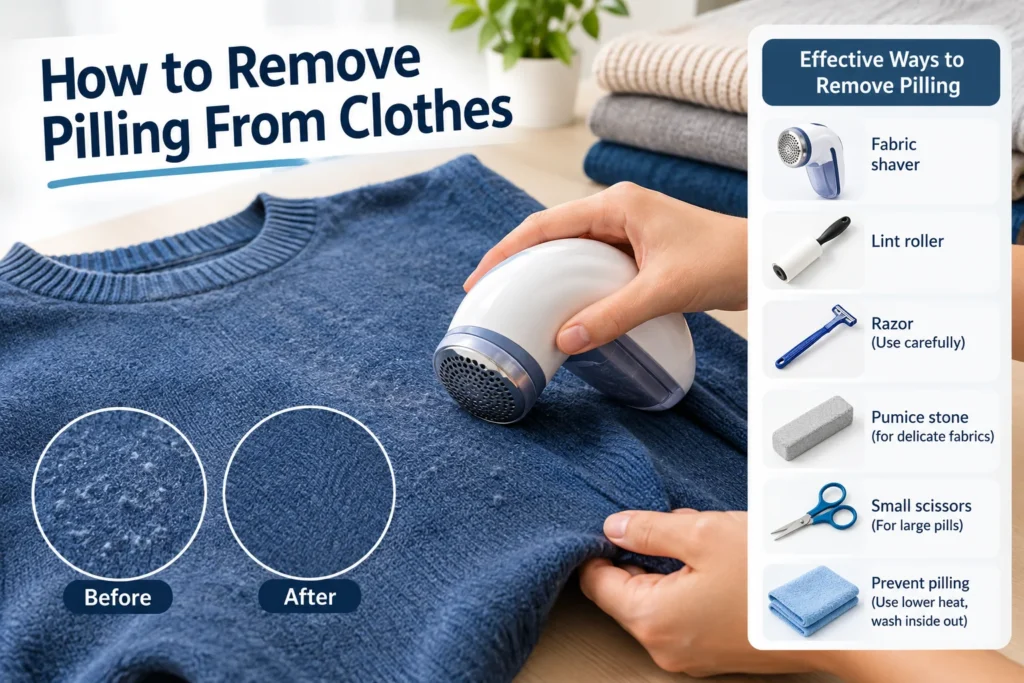
You pull a favorite sweater out of the drawer, and there they are: dozens of little fuzz balls clinging to the sleeves and sides. Pilling doesn’t mean a garment is ruined. It usually means the fibers have rubbed together enough to tangle, and with the right tool you can shave, comb, or stone those pills right off without damaging the fabric underneath.
Here’s what actually works, what to avoid, and how to slow pilling down so you’re not doing this every month.
Why Clothes Pill in the First Place
Pilling happens when short or loose fibers on the surface of a fabric rub against something, a bag strap, a car seat, another garment in the wash, and tangle into little balls. It’s mostly a friction problem, not a sign of cheap material. Wool, cotton-poly blends, acrylic, and fleece are especially prone to it because their fibers are shorter and more likely to work loose.
Tighter, longer-fiber weaves (think a dense merino or a tightly spun cotton) pill less. That’s why two sweaters that cost the same can behave completely differently after a few wears.
The 4 Best Tools for Removing Pilling
Not every tool suits every fabric. A tool aggressive enough for a thick wool coat can slice through a thin jersey tee. Start gentle, especially on anything delicate, and work up only if you need to.
1. Electric Fabric Shaver (Fastest, Best for Sturdy Fabrics)
An electric fabric shaver, sometimes called a defuzzer, has small rotating blades tucked behind a guard. You glide it over the pill area, and it shaves the pills into a collection tray.
How to use it:
- Lay the garment flat on a hard surface and smooth out wrinkles.
- Turn the shaver on and move it in slow, light circles or straight passes over the pilled area.
- Don’t press hard; let the blades do the work.
- Empty the lint tray as it fills so it keeps cutting cleanly.
This is the quickest option and works well on sweatshirts, fleece, coats, and sturdier knits. Skip it on loosely knit or very thin fabric, since the blades can catch loops of yarn if the fabric bunches up.
2. Fabric Comb (Lower Risk, Best for Delicates)
A fabric comb has no blade. It’s a small, fine-toothed tool you drag across the fabric to physically lift and separate the pills.
How to use it:
- Hold the fabric taut with one hand.
- Comb in one direction, using short strokes, rather than scrubbing back and forth.
- Shake out or brush away the loosened pills as you go.
It takes longer than a shaver, but there’s almost no risk of cutting the fabric, which makes it the safer pick for cashmere, merino, and other soft knits you’d hate to damage.
3. Sweater Stone (Good Middle Ground for Wool)
A sweater stone looks like a pumice stone and works on a similar principle: light, textured friction lifts the pills without cutting into the weave.
How to use it:
- Lay the garment flat and hold it taut.
- Rub the stone gently over the pilled area in one direction.
- Brush off the loosened fibers as they collect.
It’s a solid option for robust wool sweaters but too rough for delicate or thin fabrics.
4. Disposable Razor (Cheapest, Needs the Most Care)
A plain, single-blade razor, no moisture strip, no lotion strip, will shave pills off in a pinch. It’s slower and riskier than the other methods, but it costs almost nothing.
How to use it:
- Lay the garment on a flat surface and pull the fabric taut with one hand.
- Use short, light strokes in one direction, never pressing hard.
- Work in small sections rather than trying to cover the whole garment at once.
- Test on a hidden spot first, like an inside seam, before doing the visible parts.
This method has the highest chance of nicking a hole if you press too hard or the fabric isn’t held flat, so treat it as a last resort rather than your default.
Quick Comparison
| Tool | Best for | Speed | Risk of damage |
|---|---|---|---|
| Fabric shaver | Sweaters, coats, fleece | Fast | Low-medium (can snag loose knits) |
| Fabric comb | Cashmere, merino, delicate | Slow | Very low |
| Sweater stone | Thicker wool | Medium | Low-medium |
| Disposable razor | Anything, in a pinch | Medium | Medium-high |
Step-by-Step: General De-Pilling Process
Whichever tool you choose, the process is basically the same.
- Lay the garment flat on a table or ironing board. Working on a hanger or in your lap makes it too easy to catch fabric folds.
- Pull the fabric taut with one hand so it doesn’t bunch under the tool.
- Test a hidden area first, like the inside hem or a cuff, to make sure the tool doesn’t leave a visible mark.
- Work in small sections, using light, even strokes in one direction rather than scrubbing back and forth.
- Clear away loosened pills as you go with a lint roller, sticky tape, or just by shaking out the garment.
- Check your work by holding the item up to the light. Pills can be easy to miss on patterned fabric.
How to Stop Pilling From Coming Back
Removing pills only resets the clock; it doesn’t stop new ones from forming. A few habits make a real difference:
- Turn garments inside out before washing. This keeps the outer surface from rubbing against zippers, buttons, and other clothes.
- Use a gentle or delicate cycle and cold water where possible. Less agitation means less friction.
- Wash similar fabrics together. A rough denim jacket in the same load as a soft knit will cause pilling on the knit.
- Skip the dryer when you can, or use low heat. Heat and tumbling both speed up fiber breakdown.
- Use a mesh laundry bag for anything prone to pilling, like fine knits or anything with spandex.
- Rotate what you wear. Constant friction from the same bag strap or seatbelt in the same spot wears a hole in the fibers over time.
None of this eliminates pilling completely. It’s a natural result of fabric rubbing against things. But it slows it down enough that you’re de-pilling a sweater once or twice a season instead of every few weeks.








1 thought on “How to Remove Pilling From Clothes”